Tuesday 16 December 2014

End of Character Project


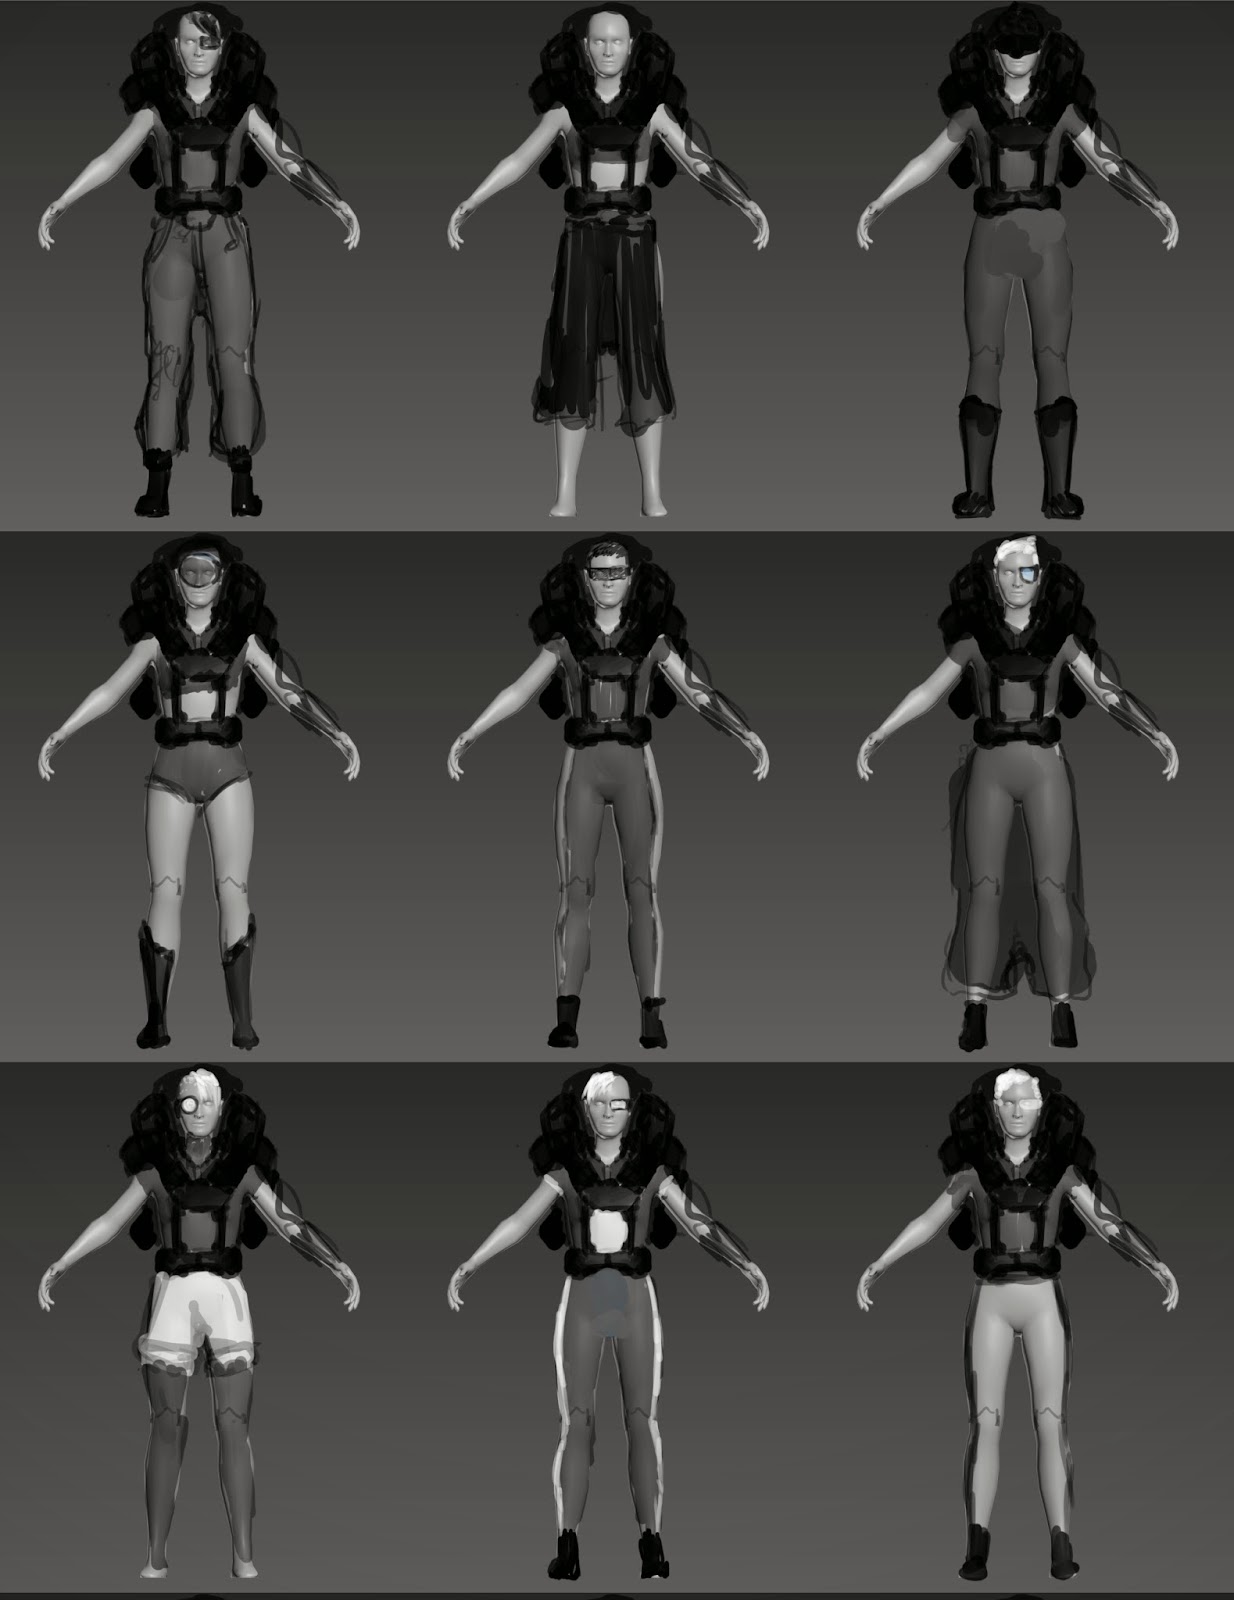
This week I rushed through the texturing in the three days remaining and it really shows. The textures are flat and uninteresting; there is very little material definition across the model. I think the only reason the jetpack reads as a jetpack is because PBR creates good metallic materials easily. The quality of the mesh and texturing are vastly different, the complexity of the mesh compared to the complexity of the textures make them both look like they are from two completely different games or even generations.


That said I am really pleased with the mesh, I think for the most part my topology is neat and smooth and would allow for good deformation if it were to be rigged, if I had more time I would’ve liked to have rigged and posed it but as it is it hardly seems worth posing this model as it is so far away from portfolio quality.


It’s not just the rushed textures that let it down but also the poor design, it was set to fail from the start, as the saying goes: “you can’t polish a turd” it was a bad design and no amount of good modelling and texturing would have changed that. I think I spent far too long trying to come up with a good design for the character, and after all that time spent I still had no good designs.


If I was to do this again I guess the only way to come up with better designs is to do more of them, so by that logic I’d have to spend much longer than I did designing, so I’d design for most of the project, hope that one design is good and then create a very low poly model to save time modelling. But even then I might not come up with a good design, so all I can take away from this is that I’m a bad designer and that’s something I need to work on.


I’ve really let myself down with this project; I can and have done far better than this. I feel as if I’m at my lowest point right now, this is the first brief I’ve really failed in. All I can do now is try harder next time.

Sunday 7 December 2014

3rd Week of Character Project


With the base body mesh complete I went ahead and did some paint overs on the mesh to try to create an interesting silhouette.


From these designs above I liked the bulkier designs that pushed the silhouette away from the regular body shape. I then took the one I liked the most and added detail.


From here I began modelling the jetpack to sit on the character. I experimented with the shape further in 3ds Max to try to push the design further.


When I had finished the mesh I did some basic value studies and unwrapped it ready for texturing next week.


I was hoping to have begun texturing this week, but I wasn’t’ generating good enough ideas for a design, I mostly settled on this one because I was really running out of time. I just ended up selecting an ok design from a selection of bad designs.

Sunday 30 November 2014

Second Week of Character Project


This second week I worked on the base mesh for my character, I’ve decided to only create one as I’d like to make a fairly high tri character.


I had trouble with the face, it took me 3 attempts before I managed to get one of a desired standard.


While modelling I was also generating silhouettes in order to come up with a final design, but with the deadline drawing nearer I was pushing myself to get a basemesh done and out of the way first that I can paint over and further develop ideas.


Our project was extended by a week (phew!), this was a great relief, especially seen as I feel like nothing positive came out of the first week of the project.


I finished the body mesh for the character, it’s now ready for paint overs which I will begin the start of next week.

Sunday 23 November 2014

First Week of Character Project


This was the first week of the character project, I’ve spent it all creating mood boards and generating ideas. Here are some of the mood boards:


I came to the decision early on that I wanted to create a sci fi female character with a companion, so I straight away got on with creating silhouettes trying to come up with an idea:


I then went onto creating mood boards for the second character:


I wanted to go for a sort of cute and loveable yet manmade theme:


I’m not really happy with any of these designs, none are really strong enough to begin modelling, which is something I need to start Monday according to our brief plan.

I presented my work to the critical studies tutors on Friday, I was hoping that I’d get some guidance as to which of my designs work, which don’t and help me possibly finalise a design ready for modelling. Instead I mostly got confirmation that none of my designs were good and it was suggested that I start again. I decided against starting again as a third of the project had already passed, instead I’ve decided to continue and to need to have decided on a final design by next Wednesday.

Sunday 16 November 2014

Final Week of Sentry Gun Project

Finally I got to the texturing, I initially intended the upper hull texture to be that similar to a solar panel as a dark blue purple because it’s supposed to be a high tech active camouflage. I really wasn’t happy with that so I tried out various colours until I got to white with a black trim. To give the active camo panels more of an interesting surface I added dots to the roughness map to insinuate a high tech surface. A lot of the materials on the turret are supposed to be a sort of matt painted metal, so I used a grey on the metalness map because it’s not solid paint, nor is it naked metal. I used projection mapping to add normals to some of the less detailed parts of the mesh. I added grime and dirt to the white areas to make it look as if it’s been used, I put light dirt collecting around the edges of the panels and then spots of mud near the floor at the front, I adjusted the roughness map to look less shiny where dirt had collected on it.


I also made a camouflage texture sheet to show that the turret can change colour


I noticed near the end of the project that the legs would probably not support the weight of the turret so I bulked them out through a couple of iterations


I think this project turned out okay, I’m pleased with the mesh, I’m very happy with my unwrapping and packing and I’d say it’s the most efficient unwrap I’ve created to date. I’m happy with how the active camouflage areas look with the dotted roughness and added dirt and grime.


As I said above I altered the legs later on in the project, and although they’re better than they originally were they still aren’t perfect, they wouldn’t be able to actually move an awful lot if an actual leg was designed like that, but due to time restrictions I couldn’t go back to add and alter geometry which would have resulted in taking away tri’s elsewhere on the model which wasn’t really an option long after the whole thing was unwrapped and halfway textured. The textures lack detail in places such as the joints and the underside of the hull, and although these areas aren’t really visible it would still have been nice to see some detail in those places. An initial stretch goal for this was to rig the mech and set it on a simple walk cycle, with the whole leg re design and the fact that I spent about twice as much time concepting as I should have I was unable to do this. As another stretch goal I intended to possibly have the texture of the active camo change in engine


 So to improve this project I would have made sure that the legs looked like they could support the weight of the hull as well as function properly. I would rig the mech and run it on a walk cycle, I’d give more attention to detail in the textures of the joints and underside of the hull, I’d setup the active camo to work in engine and I’d add sound effects to the gun as it fires.


Wireframes: